Skillful Contour Cutting with a 24 Inch Printer
It is important to realize that each graphic design application has unique elements in its Windows print driver. The interface seen here in our LXi Master Plus Cloud screen shots may not match what you see in CorelDRAW. So you may have to adapt this information to your graphic application’s features and processes for the first and last steps. But once you’re in the MUTOH print driver, the settings and functions will be the same.
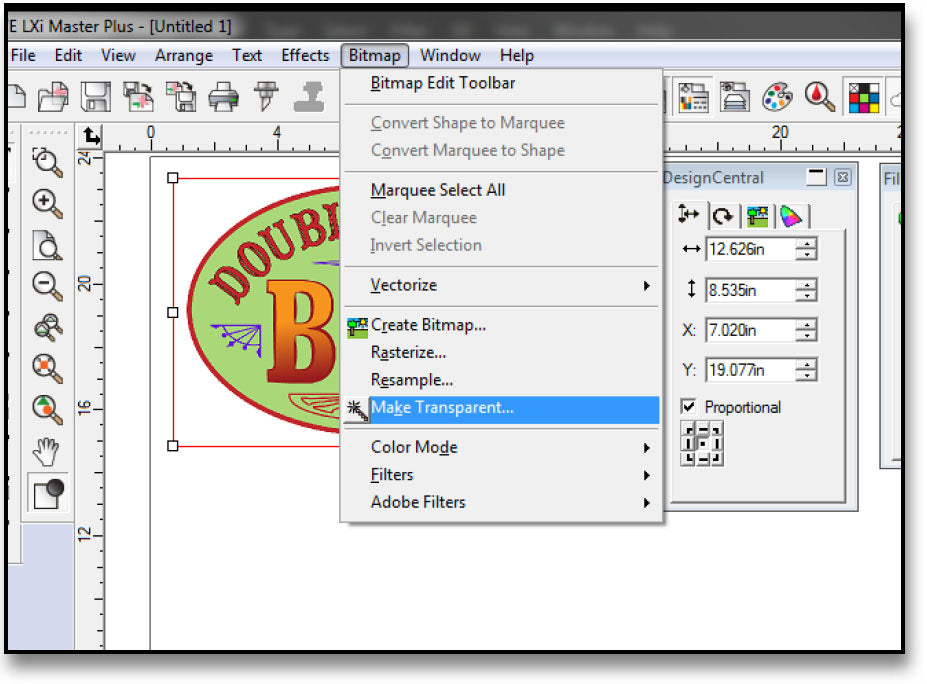
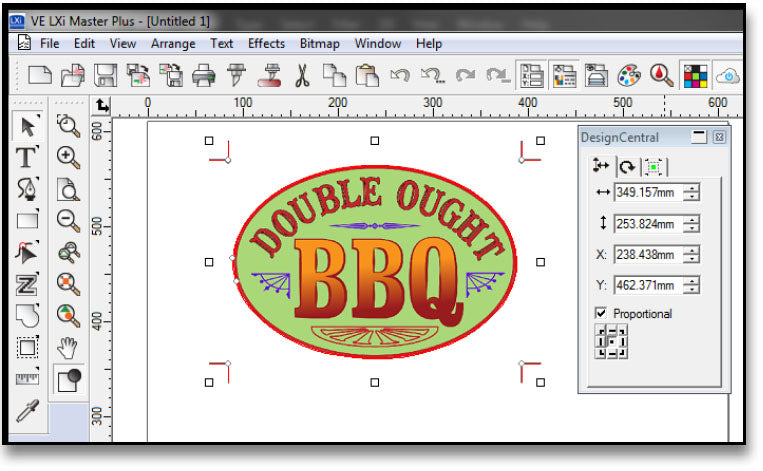
Step 1: To create a contour-cut decal from an imported bitmap image (such as a jpeg file), you’ll need to begin by making the background transparent. This is done using the bitmap edit tools found in LXi Master Plus. Click to select the bitmap, then use the marquee tool to click on the white space around the image. You’ll see the familiar “marching ants” outline showing the selected area. If your bitmap has any negative space, hold down the Shift Key and click in these areas to delete them as well. When the selection looks correct, press the Enter key or click the green Arrow in Design Central.

Here, we see the preview of the background selected. The white space around the logo is now transparent. This is important because, if you apply a contour cut to the bitmap without making the background transparent, you will add a cut path to the rectangular box around the logo.
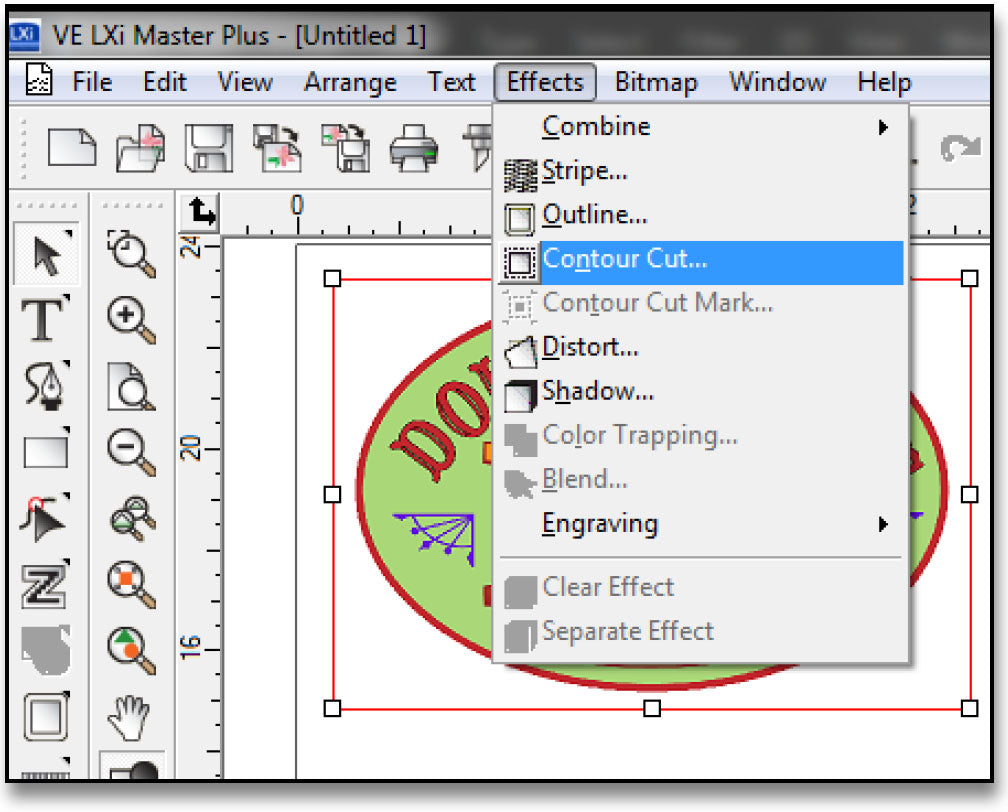
Step 2: Click Effects on the Toolbar. From the drop/down menu, click Contour Cut. Design Central will show the standard contour cut settings. The second window shows the offset. This determines the amount of white space between your logo and the edge of the decal. The Offset determines how much white space, if any, will be left between the printed area and the cut path. If you want a decal with a white border, set the offset as a positive number (this is essential in some applications like removable wall decals on vinyl). If you want a ‘full bleed’ decal with no visible white border, set the offset as a negative number (aka “choke”).
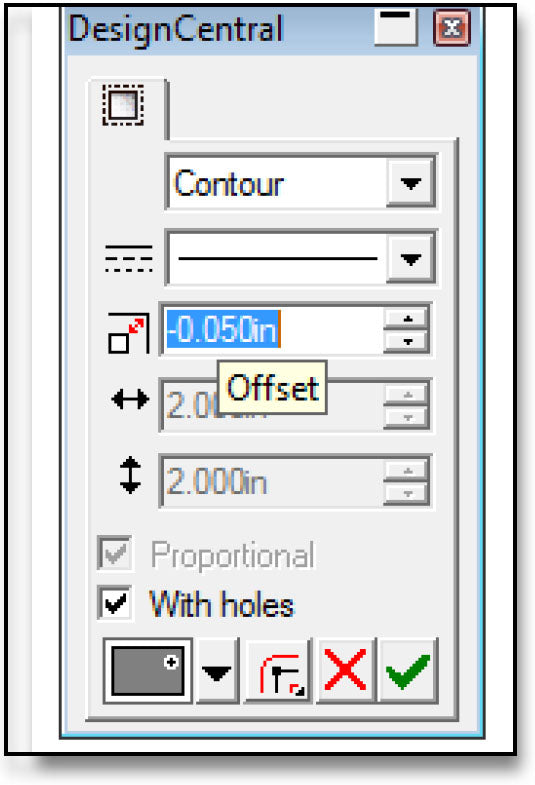
NOTE. There is a standard margin of error in print and cut alignment of about 0.001mm or 1/16”. If you have a decal with no outline or a hairline border, you may have trouble getting a consistently accurate contour cut. Design a thicker outline than you need to give yourself an acceptable margin of error. If you selected any negative space during the previous step, be sure to check the “With holes” box in Design Central so that the cut path will be applied to the outer and inner edges of the bitmap.
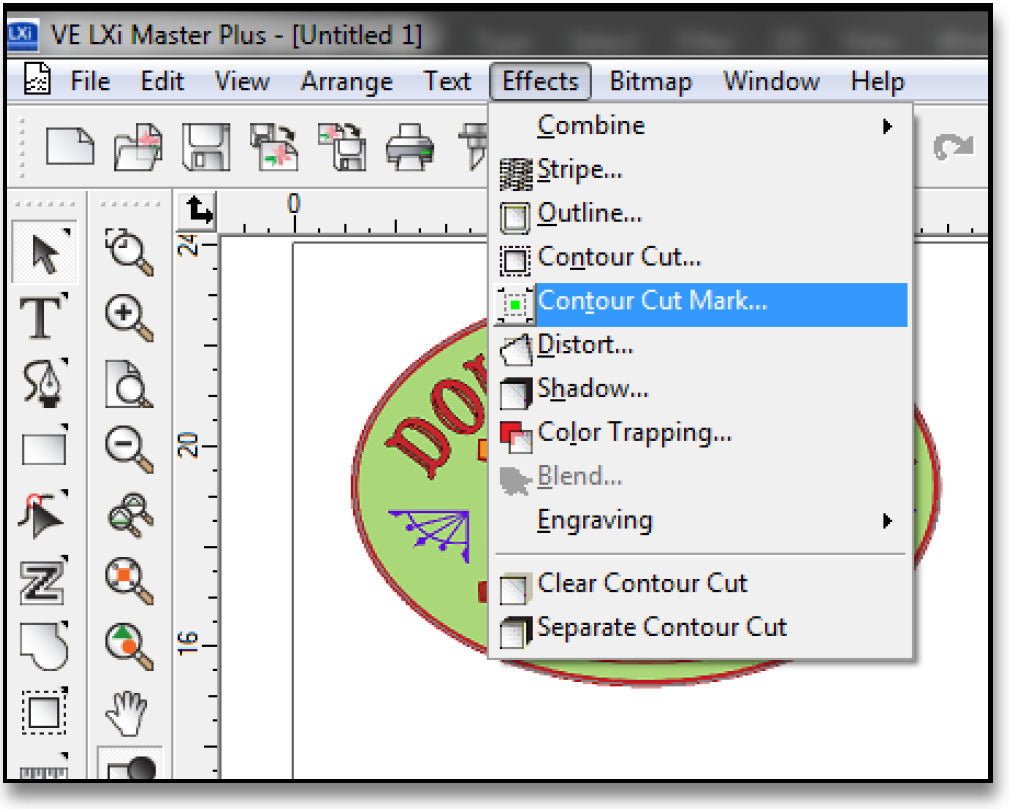
Step 3: Click Effects on the Toolbar. From the drop/down menu, click Contour Cut Mark. This effect only shows up in the drop-down menu after you’ve applied the contour cut. If Contour Cut Mark is grayed out, you haven’t applied a contour cut yet. When you select Contour Cut Mark, you’ll be prompted to select the marks that will be added to your image. These are all based on the kinds of marks read by different brands of vinyl cutters. Click the little arrow to display the drop-down menu and pick the ones compatible with your equipment. For the Vinyl Express Qe6000, select Graphtec Type 1 Automatic or Graphtec Type 2 Automatic (Fig1). NOTE: Do not select “Segmented”. This is not necessary except on very long jobs, and is not supported in LXi. Selecting Segmented marks may cause the cutter to scan the marks out of proper sequence resulting in a mark scan failure.


Step 4: Since the PrismJET VJ24 /MUTOH ValueJet 628 printer was developed in Japan, the driver’s settings are all metric. Change the default measurement in LXI to mm so it will be easier to match it up with the User Size in the print driver. Since the print driver’s standard page sizes may not fit your image, it’s best to select a custom page size that fits the actual size of the print.
Choosing a size much larger than the image area will add unnecessary white space around the print. This isn’t a problem for a single print, but if you’re printing multiple copies it can result in excess white space and wasted media. We suggest you change the default measurement in LXi to metric before sending the print job. Then sweep select the entire image, including the registration marks. This will show the measurement in mm of the image area. This will be the benchmark for your page size in the VJ24 print driver. The MUTOH VJ-628 Printer.

Step 6: Click the Properties button to access all the digital goodies. There are four tabs in the Properties window: Basic, Option, Color Adjustment, and Utility. Start with the Basic tab and click the User Size button to enter a custom print area. This is where you set it to the image size from LXi. Take note of the Orientation. Here you can choose Portrait or Landscape, rotate the image, or flip it if you need to print a mirror image. The preview icon on the left gives you an idea of how your image will be placed on the media. Pay close attention to the width and height settings and make sure those line up with the dimensions in your LXi layout.
Step 7: Click the Media Type button to select from the driver’s pre-installed media options. Or click the Advanced button to open the currently displayed media type and see the settings for resolution, passes, wave patterns, temperature etc. These can all be fine tuned to optimize print quality.

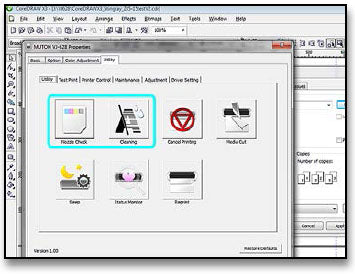
Step 8: Before you send your print, it’s a good idea to click the Utilities tab. Here you will find the printer maintenance and control functions. You can send a nozzle check to make sure all the print head’s nozzles are firing correctly and perform a head cleaning cycle if there are any clogged nozzles. After a satisfactory nozzle check has been printed, you can use the Media Cut or Printer Control/Media advance functions to feed the media forward and/or cut off the nozzle check.
Step 9: Media Cut-Off: Before you remove the image from the printer, you need to make sure you will have enough room on the vinyl behind the rear registration marks for the cutter to complete the scanning. You’ll need 4” or more of vinyl behind the rear marks. The MUOTH VJ-628 includes a convenient media cut-off feature which can be launched from the print driver or the printer’s control panel. The media cut function advances the print before cutting, but it does not advance it enough to allow enough room on the back of the print for the cutter to scan the registration marks. Use the printer control function to feed a few inches of media forward after the print is done. Then use the media cut-off function. Load the print in the plotter and select Sheet.
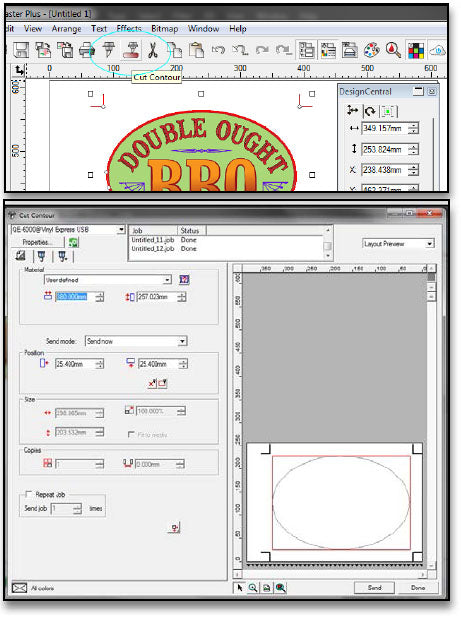
Step 10: Cut-Contour: Back in your LXi software, select File/Cut-Contour or use the Cut-Contour icon (not the standard cut-plot icon). Again, do not resize or otherwise change the image file between printing and cutting or you risk sending a set of parameters to the cutter that won’t match the pre-printed image. Cut-Contour opens the Cut-Plot window. If you see a tiled preview, the user size in the cutter settings is too small. Don’t panic. Just adjust the User Size at the top of the LXi Cut-Plot screen and enter the same measurements you had in the printer settings, (in this case 350mm x 260mm). This should give you a preview with image path neatly framed by registration marks.
NOTE: Pay particular attention to the orientation of the image in the preview. With FlexiSign PRO, the correct procedure is to load the print into the cutter facing the same way it came of f the printer. The LXI Cut-Contour driver may flip the image vertically. so make sure you load it according to the preview in the LXi cut-plot screen. The bottom of the preview image is the front of the cutter.
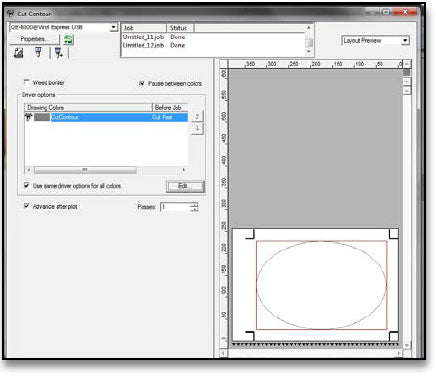
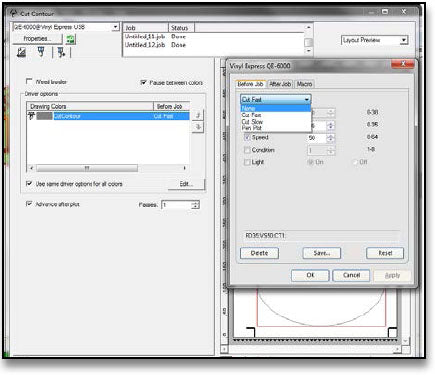
Step 11: Cutting Conditions: Set the appropriate cutting speed and pressure on your cutter. Produce a test cut on the front or back of the vinyl to ensure proper force settings. Then to make sure the software doesn’t override those settings, click the Options tab. Then review the settings in the Driver Options window. Make sure the Qe6000 blade driver isn’t set to the default Cut Fast. If it is, Click the Edit button and, from the Driver Options pop-up window, change it from Cut Fast to None. Click Send. You will be prompted to set the right front registration mark as the Origin.
Step 12: Origin: Using the cutters’ control panel, position the blade over the inside of the lower right registration mark, and set that as the Origin. (You can do this beforehand right after the test cut). Once the Origin has been set, Click OK in the LXi Cut Plot Screen. The rest is automatic. The Qe6000 will scan the right front, right rear, left rear, and left front registration marks and then begin cutting along the path you set in the LXi Contour Cut Effect. NOTE. If you see an OFF SCALE message on the cutter LCD screen during plotting, don’t panic. It will still complete the cut accurately.
Using these steps will allow you to be skillful in your contour cutting with a 24 inch printer.


