Sometimes you just have to go back to the defaults. In this article, you will find the steps to resetting a Q-Series printer to the factory default settings..
Follow these steps to reset your Q-Series cutter to Factory Defaults.
1. Press and hold the UP arrow while powering on the cutter.
2. Release the arrow after a few seconds or when the cutter displays:

3. Press 1 for Default Settings


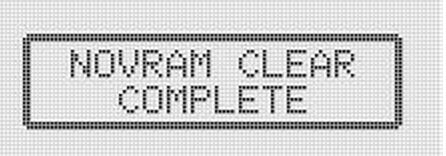
5. Press 1 to Continue and the cutter will go back to factory defaults. The cutter will display the following screen for a few seconds, indicating that it has been reset to factory default settings.
6. Once the display returns to the Default Setting screen make the following changes:
- Select #3 and set the Command to HP-GL. Press Enter to save the setting.
- Select #4 and set the Length Unit to Inches. Press Enter to save the setting.
After completing those steps turn the cutter off. Wait a second or two then power the cutter on as normal.


