Here is a summary of all you need to setup the Vinyl Express enduraCUT™3 vinyl cutter including installing the software, prepping the machine, and establishing communication from your computer to the cutter.
Software
The software installation is often the most time-consuming part of setting up new equipment. Instead of breaking your momentum later, it may be best to begin your software download first. That way, operators can prep the cutter while the software is installing. No CD or DVD is required to install the software. CLICK HERE for complete instructions on downloading and installing LXi Cloud from your online account.Hardware
The actual cutter requires little preparation before using. The cutter should arrive with a blade and blade holder assembly already in place in the cutter’s tool carriage and the AAS II™ should arrive engaged and ready for use. The optional stand is easy to assemble; however, the cutter's compact design also allows you to move the enduraCUT™3 straight from the box to a desktop or tabletop. STUDY THE USER'S MANUAL for conditions and factors to consider when choosing the best location for your cutter. After choosing a location, plug the AC Power cord into a wall outlet and attach the end into the left side of the cutter.Communication

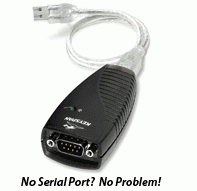
Computer (USB port) → Keyspan adapter → Serial cable → Cutter
Realizing we have oversimplified a bit, CLICK HERE for complete instructions for setting up communication using the Keyspan adapter. After installing the adapter, setup communication within Production Manager.


