Banners are a staple of the sign industry and are traditionally used outdoors, but indoor banners in the form of exhibition graphics and retail pop displays offer large and growing markets for sign & graphics businesses. The market for exhibition graphics is tied to the health of the convention industry and, despite the recent economic hardships, there are indications that this sector of the economy is growing. Most exhibition graphics are digitally printed, but don’t assume there’s no place for good old spot color vinyl. And retail POP displays are always an old reliable... many times a sample POP display in your sign shop lobby selling the banner display, with pricing, will start many sales conversations going. To help you monetize this market, we present this article: A basic guide to indoor banner displays.
Indoor Banners: A Growing Market
There are two main markets for indoor banner displays: exhibition halls and retailers.
Retail: Retail is the market that’s with us year round so it may be easier to find and target. Typically, the types of retailers who uses indoor banner displays are midrange to high end stores. These are environments in which floor space is not at such a premium as to discourage displays. Grocers and discount department store managers are under a lot of pressure to squeeze the maximum sales volume from every square foot so an X banner is going to a hard sell here. Target more upscale environments like shopping malls, cell phone retailers, and boutiques.
Exhibition Halls: Convention centers are the ideal market for indoor banners. Exhibitors need effective graphics to pull foot traffic to their booths so their sales people can engage customers. Despite trends toward webinars and other virtual meetings, there is still a lot of demand for face to face interactions between buyers and sellers. Many of these take place at trade shows. Perhaps due to the recovering economy, trade show attendance is on the upswing, at least here in the Lone Star State. The Dallas Convention Center hosted 64 events in Fiscal Year 2011. While that represents a 45% decline in the number of events from FY2010, attendance was up 715,000 to over 1.6 million attendees. That’s a lot of potential viewers for your banner displays. With the exception of FY 2010, total attendance grew every year from 2006 through 2011. Total growth over the six year period was over 680,668. So things are looking up. And, if the Dallas trend is typical, there are more people looking up at banner displays in convention centers. Contact the marketing director at your local or regional convention center to get list of events and exhibitors. Many of these exhibitors are potential customers for your eye-popping professional quality graphics.
Display options
Indoor banner displays come in several popular options including X banners, rollup or popup banner stands, and show screens. By far the bulk of the business is in X banners and roll up banner stands. They’re easy to use, easy to store and easy to make.
X Banners are simple and economical, light weight and very easy to move. They’re comprised of two lightweight, flexible plastic poles that cross in an X pattern; hence the name. There are clips affixed to the ends of the poles that fit into the grommets of a finished banner blank. These are usually adjustable for different size banners and for controlling the amount of tension in the banner. For some customers, they’re too easy to move because the X stand lacks enough weight to keep it from being knocked over by milling customers. These are good for budget-conscious customers, and informal or short term events. We use them at SignWarehouse to direct customers to the training room at our equipment training classes.
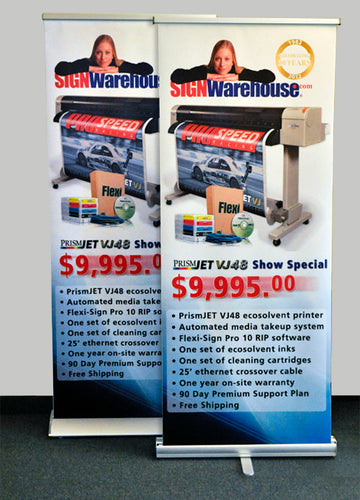
Rollup or pop-up displays are more substantial and come in two basic styles defined by the shape and size of the base. (Fig. 1) All have a base containing an apron on a spring loaded wheel. The other elements are an upper frame that holds the top of the installed banner and a vertical support that holds the upper frame in place when the banner is on display. Once the frame is clamped to the banner, the bottom of the banner is taped to the apron, then allowed to retract into the base for storage. When it’s time to display the graphic, the end user simply places the vertical support in the base and pulls the frame upward and hangs it on the top of the pole. The process of unrolling and displaying the graphic takes less than a minute and the base doubles as a protective carrying case for the banner when it’s not being used. For a pictorial guide to this process, please click here for our Endura Banner Stand Setup Guide. The more economical stands have a simple, slim, tube shaped base made stable by a cross member or ‘foot’ that pivots perpendicularly to the base to give it more stability. There are single and double foot configurations, but don’t assume that more is always better. Some single foot stands are more reliable than double foot stands because they have more rugged internal mechanisms. Premium stands have a broader and more elegant curvilinear base. The larger base produces a lower center of gravity which makes the display more stable. Some premium stands come with two vertical support poles for double sided displays. Since one size rarely fits all, it’s a good idea to offer your customer choices. Fortunately, these products are not terribly expensive. You could stock one of four types of banner stands and have less than $300 tied up in inventory.
Expandable screens & teardrop displays. Speaking of different sizes, there are other options for graphics that are very large or very small. An expandable screen is a perfect companion to Banner Pro hemming system which creates super strong heat fused pole pocket seams. These larger than life displays can be used as marketing piece to attract traffic or as backdrop for live presentation or smaller displays. Speaking of smaller displays, “teardrop” style fabric displays are gaining in popularity. Their non-rectangular shape makes them dynamic substrates, but represent a challenge for most small to medium sized sign shops because the fabric sign element must be sewn onto the frame. If your customer insists on this format, you may need to find a wholesaler to whom you can outsource the production of the finished display based on your artwork.
Ink & Vinyl
Most rollup banner displays are printed. However, there’s no rule that says they have to be. Plotter vinyl on indoor banners works too as long as the vinyl is sufficiently conformable. Cast or intermediate calendared is best. Vinyl is a natural choice for X banners because they’re simpler and more economical displays. (Fig. 2) You can also add vinyl accents to printed rollup banners to give them more visual pop or match a desired spot color for a picky customer. If you do add a vinyl accent to a banner stand printed with solvent or eco-solvent ink, remember to apply the vinyl to an unprinted area of the banner or allow the print to outgas for 24 hours before adding the vinyl overlay. Otherwise trapped solvents will build up under the applied vinyl and weaken its adhesive. Here’s an example of an ultrametallic accent on a banner stand printed on PrismJET 15oz popup material. (Fig 3.) Metallized polyesters like Chrome and holographic films are not recommended because they’re not flexible enough to be rolled and unrolled repeatedly without delaminating from the banner. Okay, you can print the image or plot it. But these are banner display systems. So you might be wondering what kind of banner material you should use.
For short term two or three day events, just about any weight in printable banner media will work, but banner material with a super smooth finish will give your graphic the best possible substrate. The smoother surface removes typical scrim textural distractions that reduce image quality and brings out the details in the print. It’s the ideal choice for high resolution graphics that will be viewed up close. So a short term event might be well served with a print on double-sided super smooth banner.
But, for longer term use, you’ll need a banner that not only looks good, but resists edge curl. Curling edges are the bane of banner displays because they make your display—and the customer’s message—look flimsy. For semi rigid banner displays, we offer got two stout, super smooth, high resolution options: PrismJET 15OZ Popup film, and Sihl 3608 semi-rigid film. Both of these products support high resolution prints that hold up to close scrutiny and can be used and reused without worrying about wilting edges. PrismJET 15OZ film is a 16mil, two side printable PVC with a flame retardant certification. Sihl 3608 is a very stiff 12mil PVC film with a high white point for splendid print quality.
Design and Installation Tips The most frequently asked question about installing prints in rollup banner stands is about what you don’t see. Specifically, how much of a bleed should designers add to the bottom of the graphic to prevent the installed banner from showing its underwear when pulled up from the base. You don’t want your professionally designed print showing its undies; unless your client is a hip-hop clothing retailer, in which case it might be fun to put a boxer shorts pattern at the bottom. To produce a uniform image that goes all the way down into the case, add 3.5” to the height of your design. So if your specifications state that the stand is designed for 32” x 78” graphics (the most common size), print your image 81.5” tall. You’ll need about 3 additional inches at the bottom to cover the apron that anchors the media to the motor and an additional ½” at the top to tuck into the upper frame. One more tip. Since you’ve added 3” to the bottom of your print, you’ll need to position the bottom so that it completely covers the white apron. If you add the 3” to the design, but fix the lower edge of the banner to the black line indicated on the internal instructions, you’ve defeated the purpose of adding the three inches.
So now you have some helpful hints to help you get started making high end indoor banner displays. Try an assortment of stands so you can give your customers a range of choices. And don’t limit yourself to what comes out of the printer. You’re in an industry where creativity can be a vital asset to success. Experiment with different looks, different combinations of ink, media, and accents. Then go find your local convention center marketing manager and start hawking your wares.


