Simplifying Customer Art Approval Via SAi Cloud
The Art Approval tool is an exclusive feature for version 12 of LXI Master Plus and FlexiSign. The Approval tool allows users to send a copy of the customer's job to them for review, correction, and approval. This option allows your customer to make on-screen annotations and related written comments about things he or she would like to have changed.
Using the Approval Tool Screen
To open the Approval tool:- Click the Send for Approval
 icon located in your Cloud Apps. If the icon is not visible, an alternative method is clicking File in the menu toolbar followed by Send and Send to Approval Tool.
- This will launch the Send for Approval window which contains two sections—an Instructions section and a Send for Approval list.
- Follow the steps in the Instructions section:
- If you haven't already done so, upload the file you want to send for approval.
- Select the file from the Send for Approval list.
- Complete each of the required fields, marked by an asterisk.
- If desired, complete the optional fields.
- Include any Comments you may have.
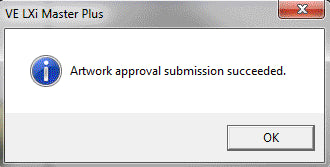
- Click Send for Approval.
Job Approval Email
A Job Approval email is sent to the address that you entered in the Customer Email field. The sent email contains a link to the archived design file. When the customer clicks on the link, the Job Approval Tool launches.
The tool enables the customer to add position-specific pushpins and written comments to the archived file to indicate what needs refinement or correction before the job can be approved.
Marking Areas for Correction
-
The customer clicks on an area needing correction.
- A pushpin appears on the design where the customer clicked, and a description box appears.
-
The customer enters comments as needed to describe the desired correction; then clicks Save.
- To close the Description box without comments, click its Close button.
- The customer repeats the process until all the desired comments have been entered.
-
The customer clicks SEND COMMENTS.
-
The comments are sent to the SAi Cloud server, where they can be retrieved by the designer using the Messages icon
 in the Cloud Window.
-
Correcting and ReSending a Design File
The designer can make the requested adjustments, re-archives the design file, and resend the corrected file using the Send for Approval icon ![]() . The customer receives another email with a link to the Job Approval Tool and verifies that the requested adjustments have been made.
. The customer receives another email with a link to the Job Approval Tool and verifies that the requested adjustments have been made.
If further correction is needed, the customer can add new comments and click SEND COMMENTS. When the design file is fully ready, the customer will click APPROVE, and the designer will receive an Approval confirmation message.


