The UniNet iColor 560 desktop laser transfer printer is a great value for garment decorators. It comes with iColor ProRIP software at no extra charge. The bundled software includes intelligent but easy-to-use features that make laser transfer less intimidating. The iColor 560’s five toner color set makes it one of the most versatile approaches to t-shirt printing.
As versatile as this technology is, there are a couple of drawbacks. Some decorators find that, when printing a full-color graphic, the applied transfer can feel a little stiff. This is because you’re applying two layers of toner plus a layer of adhesive to the shirt. This can result in a transfer that feels heavy, especially on large simple images. Fortunately, the iColor ProRIP software includes a simple solution with a quirky name.
The stiff feeling associated with laser transfer images comes from the fact that you’re applying two layers of toner plus a layer of opaque adhesive, to the fabric. The top layer is the CMYK process color that defines your image. The bottom layer is the white toner under-base that blocks the color of the fabric and supports the correct color. And beneath that is the adhesive from the B paper that sticks it to the shirt. These combined layers can feel stiff, especially on a large transfer. The simple solution is to remove as much o the toner as possible. This is done through one of the cool features in the bundled ProRip software
iColor ProRIP: KnockMeBlackOut
iColor ProRip has a lot of thoughtful features that support laser transfer on light or dark garments. The dark garment tools include a function called KnockMeBlackOut. This cool RIP tool analyzes the process color image and determines where the darker hues can be removed in favor of the underlying substrate. Think of it this way. When you print on white paper or media, you don’t need white ink or toner because the paper supplies the white. You just add color. Conversely, when you’re printing on black, you don’t need black ink or toner because the substrate supplies that. You just have to remove the black and darker hues from your transfer and let the fabric show through.
Advantages
There are two immediate benefits. The transfer feels softer, which is the main point. The side benefit is that you use less toner, so your print cost is lower. As with all things in garment decoration, there are tradeoffs involved and adjustments to be made.
Design Considerations
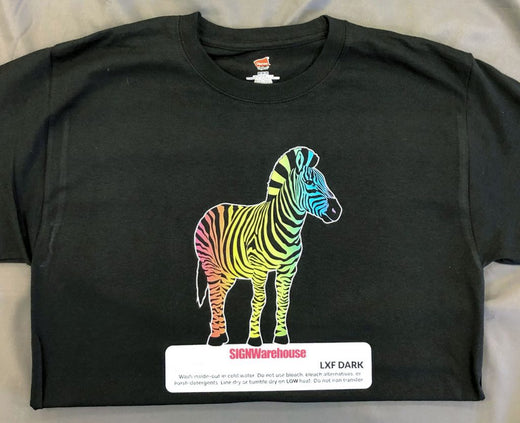
If your design has dark or black areas that define the shape, removing those can cause it to get lost. In this case, you may need to add a white outline. This is a graphic style familiar to illustrators and fans of graphic novels and comic book art. Outlines help bring the foreground elements into sharper focus against the background. Adding an outline to your image can help preserve the shape when you use KnockmeBlackOut to remove the darker areas of toner.
The Process: How to ‘Knock me black out’
How to set up the Knock Me Black Out using a PDF File:
- At the top of the ProRIP, select the Job Properties by right clicking on the print job.
- Select the Color Layer (the 2nd tab from the top).
- In the Color Tab, select Processing Options (second tab from the top), Then select “Knock Me Black Out”.
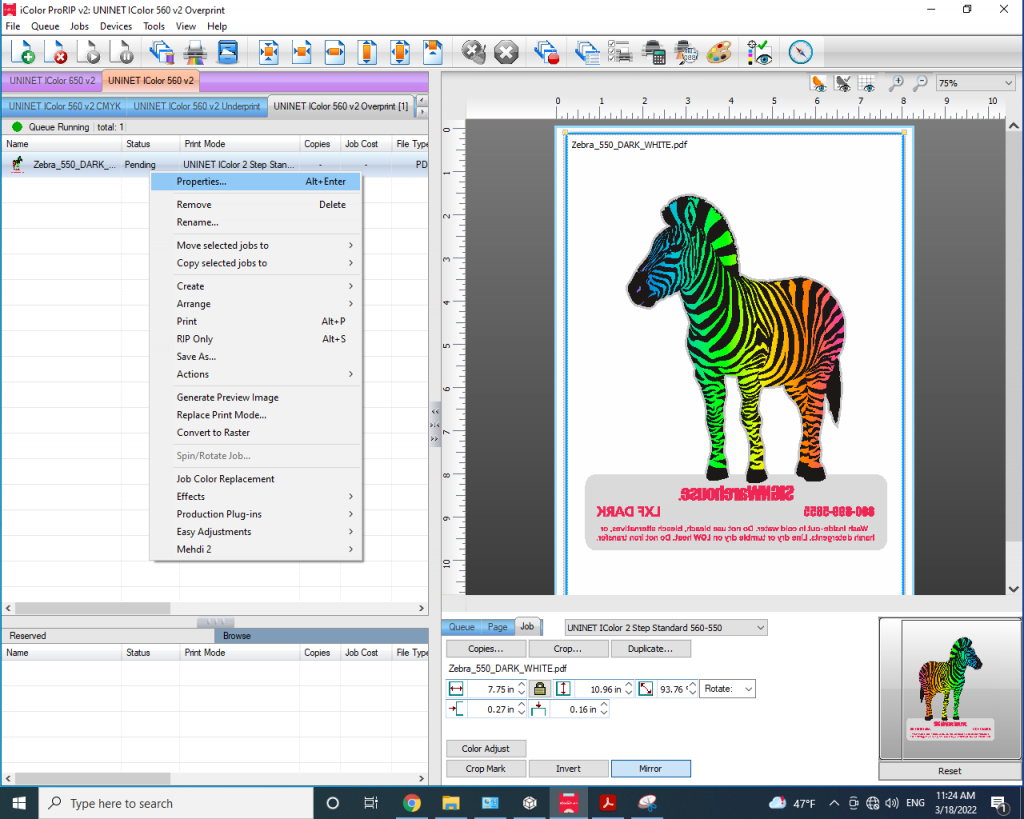
FIG 1: Right click and open Job Properties

FIG 2: The Color Layer Processing Options.
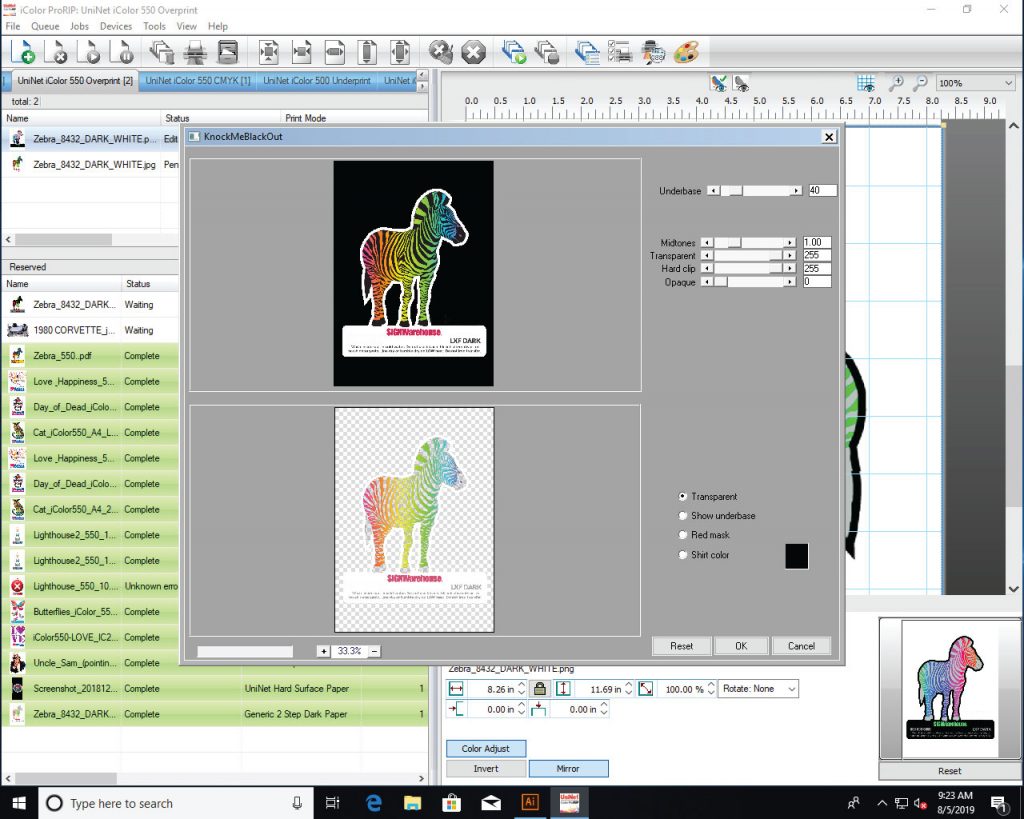
- The tolerance level determines how wide a net the RIP casts when selecting pixels to be deleted. The default value is 70. Lowering the tolerance value too far will remove too many pixels and reduce the color gamut. For the Zebra transfer, I selected 40.
How to set up the Knock Me Black Out using a PNG or JPG:
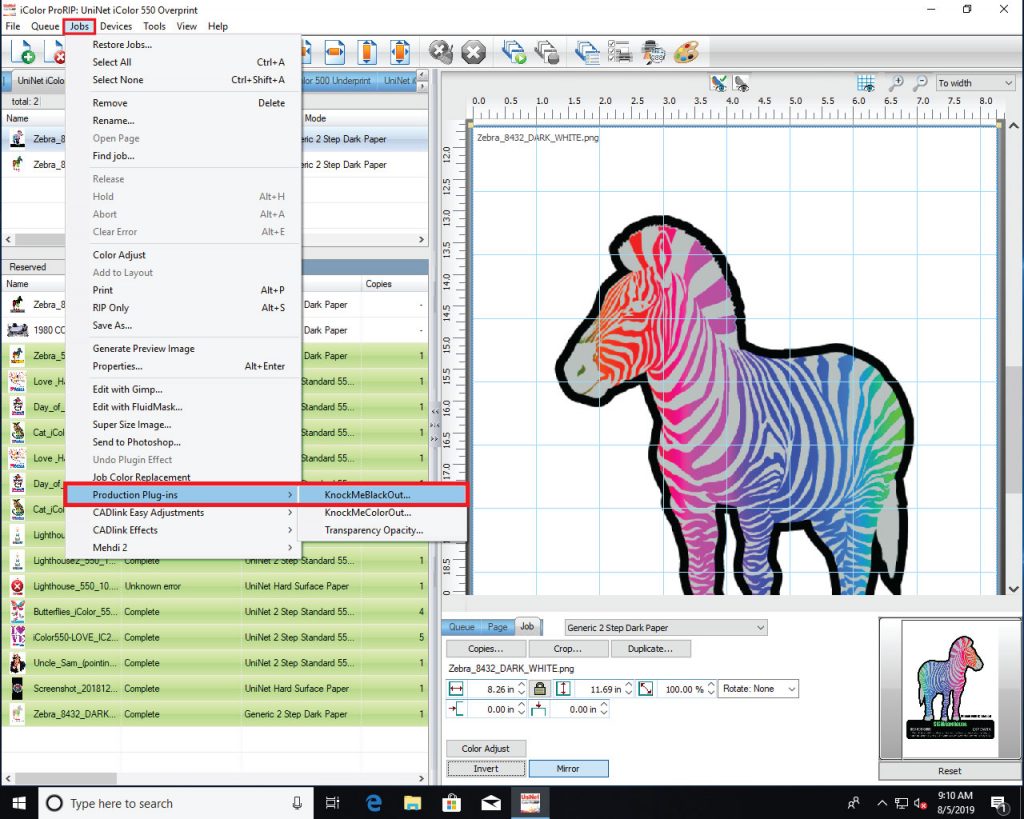
- At the top of the ProRIP tool bar, select the Job drop down menu.
- From the Job menu, select Production Plug-ins. From the fly-out menu, click Knock Me Black Out.
- This will show a preview of the image. Experiment until the preview looks good to you.
- Hit okay and set the rest of the job up in iColor ProRIP. Once you are ready, hit print and watch the magic as your graphic comes off the printer with nothing but intense, vibrant color.
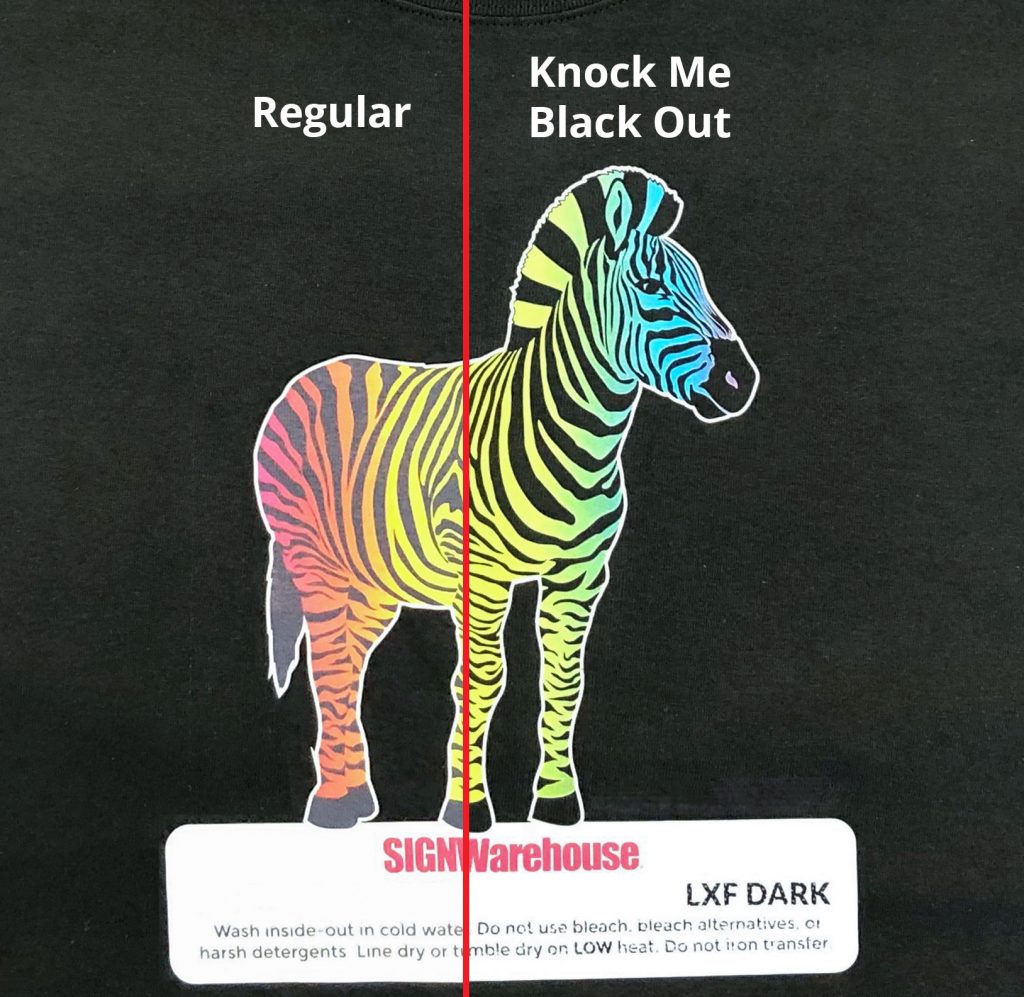
The image on the right shows a comparison of the two prints. You can see how the default setting without KnockMeBlackOut actually produces weak black tones and reduces the overall contrast on the print. The right side shows the results using KnockMeBlackOut. Removing the black pixels not only softens the transfer, but gives it more contrast and saturation.
As you can see, there are lots of advantages for this powerful feature in ProRIP. Because of the versatility of the bundled iColor ProRIP, you can use the tool with both jpeg images and PDF files. With just a few mouse clicks, you can take a heavy-feeling transfer and convert it to something that allows the garment to breathe and softens the feel of the applied transfer. The fact that you’re reducing toner also means you’re lowering your print costs. And, as you can see, the finished product even looks better. And, did we mention that the software comes at no extra charge? Free software, softer transfers, lower printing costs, and more visual Pop! These are some of the reasons decorators love the iColor 560.


