What Is Auto Serialization?
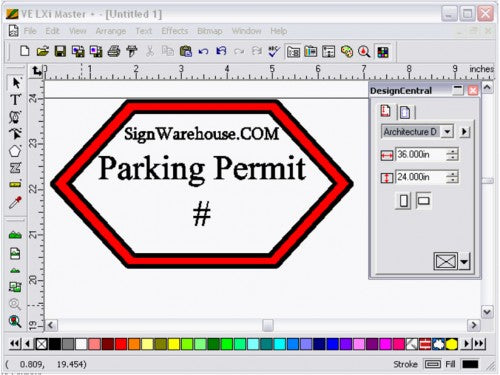
Auto Serialization is designed to create multiple copies of an object with a unique serial number on each copy. When using Auto Serialize, you will designate a character or line of text to be replaced with the serial number. In this example we will replace the "#" with the serial number. Here is a simple parking sticker we are going to use:
1. Select the entire image (use either CTRL + A, or click Edit -> Select -> Select All):
2. Now, click Arrange -> Auto Serialize:
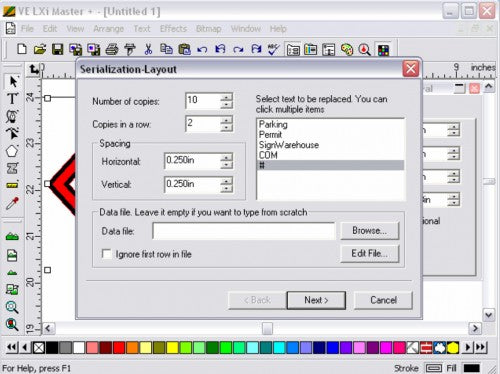
3. This is the "Serialization Layout" window. Here you can set the number of copies you are creating and how many you want in each row, as well as the spacing between copies. This is also where we will select which piece of text we are replacing with the serial number by clicking on it in the right-hand box. (We have selected the "#" to replace.) There is also an option to select a Data File. This will be discussed in another article. Click Next to continue to the next window:
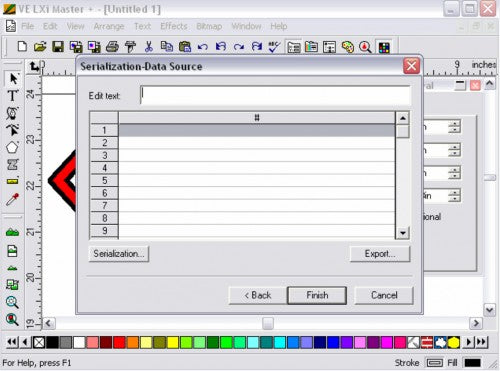
4. This is the "Serialization Data Source" window. Here, click "Serialization":
5. Now we are on the "Serialization" window." Here you can choose how to serialize, what number to start with and what to increase it by. After you have set your parameters, click OK:
6. We are back on the "Serialization Data Source" window. Notice the serial numbers are now filled in. Click Finish:
You will now have (in this case) 10 copies of the object, each numbered individually.


