We interviewed Leif from SignWarehouse Product Support to get his tips on reducing the DPI on images without losing print integrity. Here are his takeaways:
"When dealing with huge or highly detailed raster images, oftentimes the “File Size” (the amount of data being transferred digitally) is a large number. This is a very common problem that causes new printer owners to have their prints stop in the middle or the prints become discolored.
"Here is an example of a raster image I sent to the production manager to show the file size. For most of my prints I try to shoot for 1000-5000k. We are going to lower the DPI.

First, with your file selected, go do File then Export

"Next, name your file, select the save type as PDF, and make sure Suppress Options is unchecked

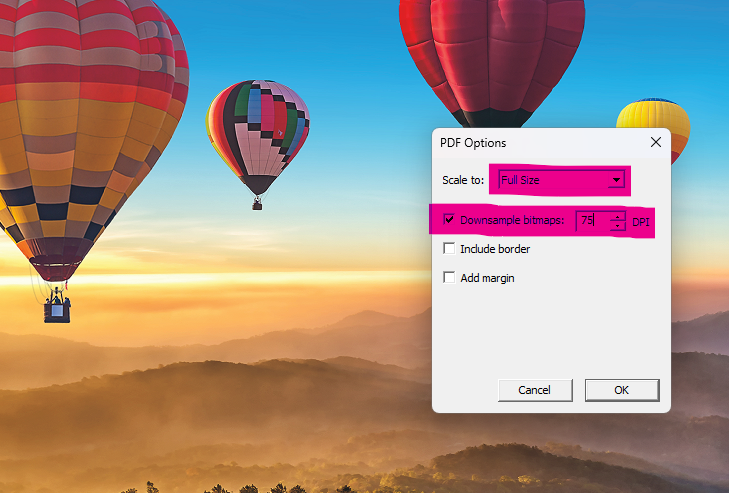
"Then make sure the scale is set to Full Size. Check the box to Downsample bitmaps, then lower the DPI.
"The DPI starts at 300 by default, but I prefer to divide by 2, until I find a DPI that performs well on the printer.

"Now back in Production Manager, go to your printer and Add Job. Add the file you just exported.

"Notice how at the same physical size, our file size is a lot smaller?

"Those are my tips for reducing the DPI for images. Hope they help you!"


