
MUSE vinyl cutters are delighting and amazing customers all across the country. The MUSE family of cutter is loaded with exciting features like Wi-Fi connectivity, custom LED platen lighting, a user-friendly touch screen, and others. With so many features, it’s hard to keep track of them all. Today, we are going to look into a little-known but really cool MUSE feature that goes beyond vinyl graphics and runs mainly through the Create Space software option. We’re going to talk about how to use the MUSE scribe engraving tool.
Why Use a MUSE Vinyl Cutter as an Engraver?
Before we get into the details of how to use the MUSE scribe engraving tool, you might be wondering, why. Why use a vinyl cutter to engrave metal and plastic?
Well, there are two main reasons. The first is cost.The MUSE M15 costs much less than a rotary or laser engraver.
The second is, well, smell. Engraving some plastics can cause odors that have to be filtered and vented. There are no such problems with the MUSE engraving tool. Sure, it takes a little longer than a rotary or laser engraver, but if you’re making designs for craft and hobby applications like gifts or name tags, you don’t need a high-speed solution.
Using the MUSE Scribe Engraving Tool:
An Easy, Five-Step Process
Scribe engraving with types of plastics and metal is supported with Create Space software. The scribe engraving tool can be used to engrave vellum, foils, acrylic, and most soft metals like trophy labels, dog tags, and charms. In Create Space, there are two ways to produce beautifully engraved art. You can engrave outlines or solid fills. The Create Space Line Fill effect makes amazing engraved images with solidly filled shapes. Or you can just use the standard vinyl effects for elegantly engraved outlines. It's actually pretty simple. By the way, we're focusing today on Create Space because it's the better software solution for scribe engraving. Here are the steps we're going to follow.- Measure your engraving blank
- Tape it to your cutting mat
- Set the page orientation in Create Space
- Choose the Line Fill Effect or outline
- Set the Force, Speed, blade and offset settings
Design and Layout in Create Space
 FIG 1. Create Space design mat in landscape
To get started, you need to know how big your item is before you start designing. If you have a different type of shape like a bone-shaped dog tag, you can scan the item and use Create Space to vectorize the image. If it’s already a vector like a simple circle or rectangle, you can use the shape tool and measure the item. This is just a placeholder for the design.
Now, you can design in Create Space or your favorite design application, and import it into Create Space. Depending on whether or not you have the mat set in Landscape (FIG 1) or Portrait mode (Fig 2) , you may need to put the design in the bottom corner of the mat. In Fig 1 below, you will see a small triangle in the corner of the mat. This helps you remember which orientation you’re using.
The triangle shows where to place the design so the MUSE will start engraving in the correct spot. Now, when you go to put the item on the sticky mat, you don’t need to put the item in the corner. This is a starting point for the engraving job.
Use the MUSE Cutting Mat

Each MUSE vinyl cutter comes with an adhesive cutting mat for working with non adhesive-backed materials. The cutting mat has a clear plastic cover that protects a tacky surface. Lots of flat media can be placed on the tacky surface of the cutting mat. This includes card stock, magnetic inkjet paper and, of course, engraving stock. Some items need a little more sticktion, so to speak. So for this application, you will need your cutting mat, some masking tape or double-sided tape, and your scribe engraving tool.
You can use either masking tape or double-sided tape to fix the blank securely to the cutting mat. This will keep the item from moving around too much. Note that if you are using strong double-sided tape, this may pull some of the adhesive off your mat. If you are using masking tape, keep this in mind when you are designing as you are going to need margins for the tape. If you choose to use double-sided tape, you can go closer to the edge.
Create Space Line and Fill Effects
Select your design and go to Effects>Line Fill. A window will pop up and you can set your line fill. For the line spacing, a smaller number is going to keep the lines closer together. The ideal spacing is 0.004 inches, or 0.1 mm. You can rotate the fill so that the passes are applied at an angle (FIG 3). This adds a nice effect. You can set any angle you desire. The setting is in degrees, where zero is a perfectly vertical line and 90 is horizontal. You can pick any angle up to 360. The other option is to add cross-hatching with the line effect. This will keep the angle but go back over the design in a cross-hatch pattern like what you might see in an old-fashioned pen & ink drawing. We found that this effect works better with plastic material than with metals. When engraving plastics with a Line Fill effect, the cross-hatch option gives you a nice, even, solid fill (FIG 4). Hit okay and the effect will be applied to the design. Now you are ready to send it to your Muse!

Speed, Force, Blade and Offset Settings
Place the scribe engraving tool in the tool carriage. If you can, test some pressure and speed settings to get the correct depth for your blank. Yes, some engraving blanks can be pricey, but having an extra piece or two to test settings will save money in the long run. Using a couple for testing is much better than wasting 5 or 6 because you started engraving before fine-tuning the force and speed settings. Speaking of speed, we found slowing the speed down helps with engraving. It gives the cutter time to precisely scribe the graphic. These are simply our suggestions. We recommend you test to find the correct settings for your cutter and blanks.
We used an M15 for testing. Here are the settings we used for the engraved metal blank in FIG 3 above. It is a 20 mil (0.02 in) aluminum blank.
- Force: 60
- Cutting Speed (VS): 4
- Carriage Speed (US): 8
Here are the settings we used for the engraved plastic blank in FIG 4. It’s an IPI Front Laserable Engraving blank.
- Force: 75
- Cutting Speed (VS): 4
- Carriage Speed (US): 8

Beautiful Engraved Art from Your Vinyl Cutter
Now open Create Space and select Cutter. The Cut Setting window appears. Most of the default settings are fine for engraving and don't need to be changed. The main settings that will need to changed are Blade Offset and Over-cut. These are mainly for using a blade to cut vinyl. They are not necessary here and can be set to 0 mm. You can use just one pass or multi-cut. Using the multi-cut option will help engrave more deeply in thicker blanks. But you can engrave with one pass with the correct settings.
Engraving with LXi
We tested the ability to engrave stripes on the Muse 60 just like the smaller models (like the Muse 24 and 15). The test was not just to verify if it could engrave but also if you could engrave in LXi 22.
On the Muse 60 cutter, we changed the settings to:
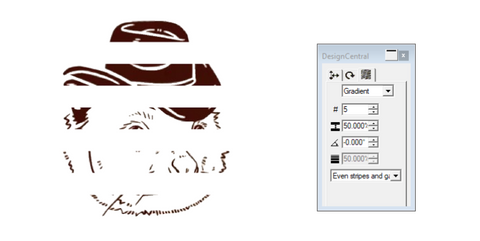
Inside of LXi, we used the “Stripe” effect

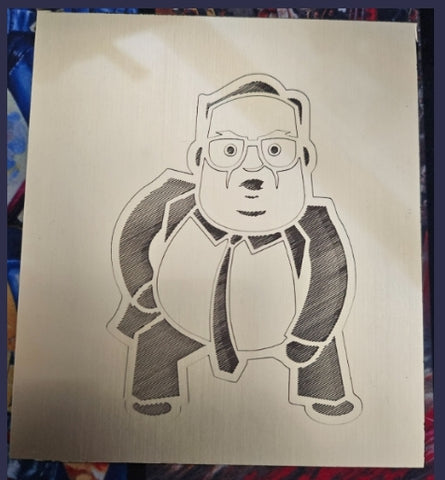
You can see that the image has some pretty large stripes now.
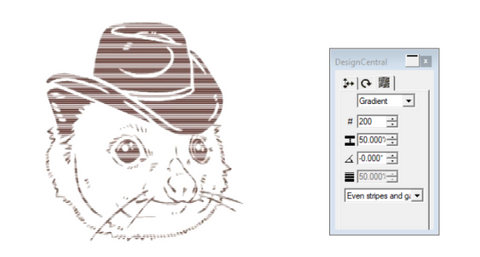
Next we decided to:
- Keep it as a gradient
- Change the amount of stripes to an amount that keeps the image how we wanted it (we liked how 200 stripes looked). You can see where we chose to use 200 stripes in the second box by the # sign.
Though we liked the 200 stripes, we didn't like the angle. We changed the angle to 30 degrees and liked the result.
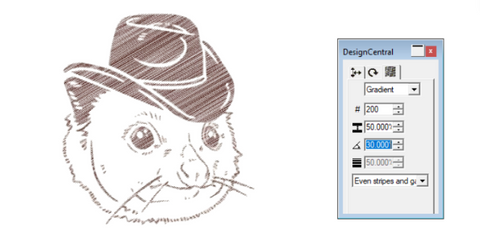
This result looked much better to us. The stripes were a nice amount and the angle gave the image a realistic look.
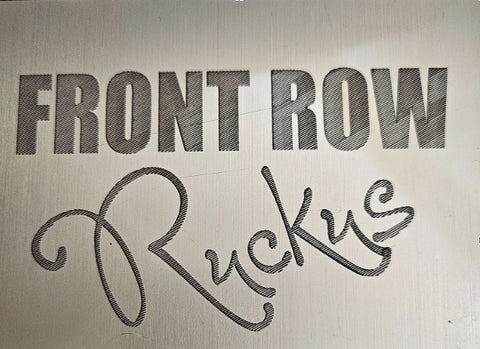
Then we tried a couple more engravings that came out well.
Final Comments
We really packed a lot of productivity into these MUSE cutters.
The scribe engraving tool comes with the M15 and M24. The M60 also supports this option, and has two cutting heads, so you can load a blade and an engraving tool. But the M60 comes with a blade and creasing tool, so if you'd like to engrave with your M60, you'll need to purchase the tool separately.
No matter which model you choose, a vinyl cutter is more cost-effective than a rotary or laser engraver and doesn’t need to be vented and filtered when engraving plastics. It does take a little bit more time than cutting vinyl, or engraving with a rotary or laser engraver. But for personal or crafty name tags, gifts, and keepsakes, you may not need a high-speed solution. Engraving metal and plastic blanks in Create Space is just one of the many exciting things customers are doing with their MUSE vinyl cutters.


